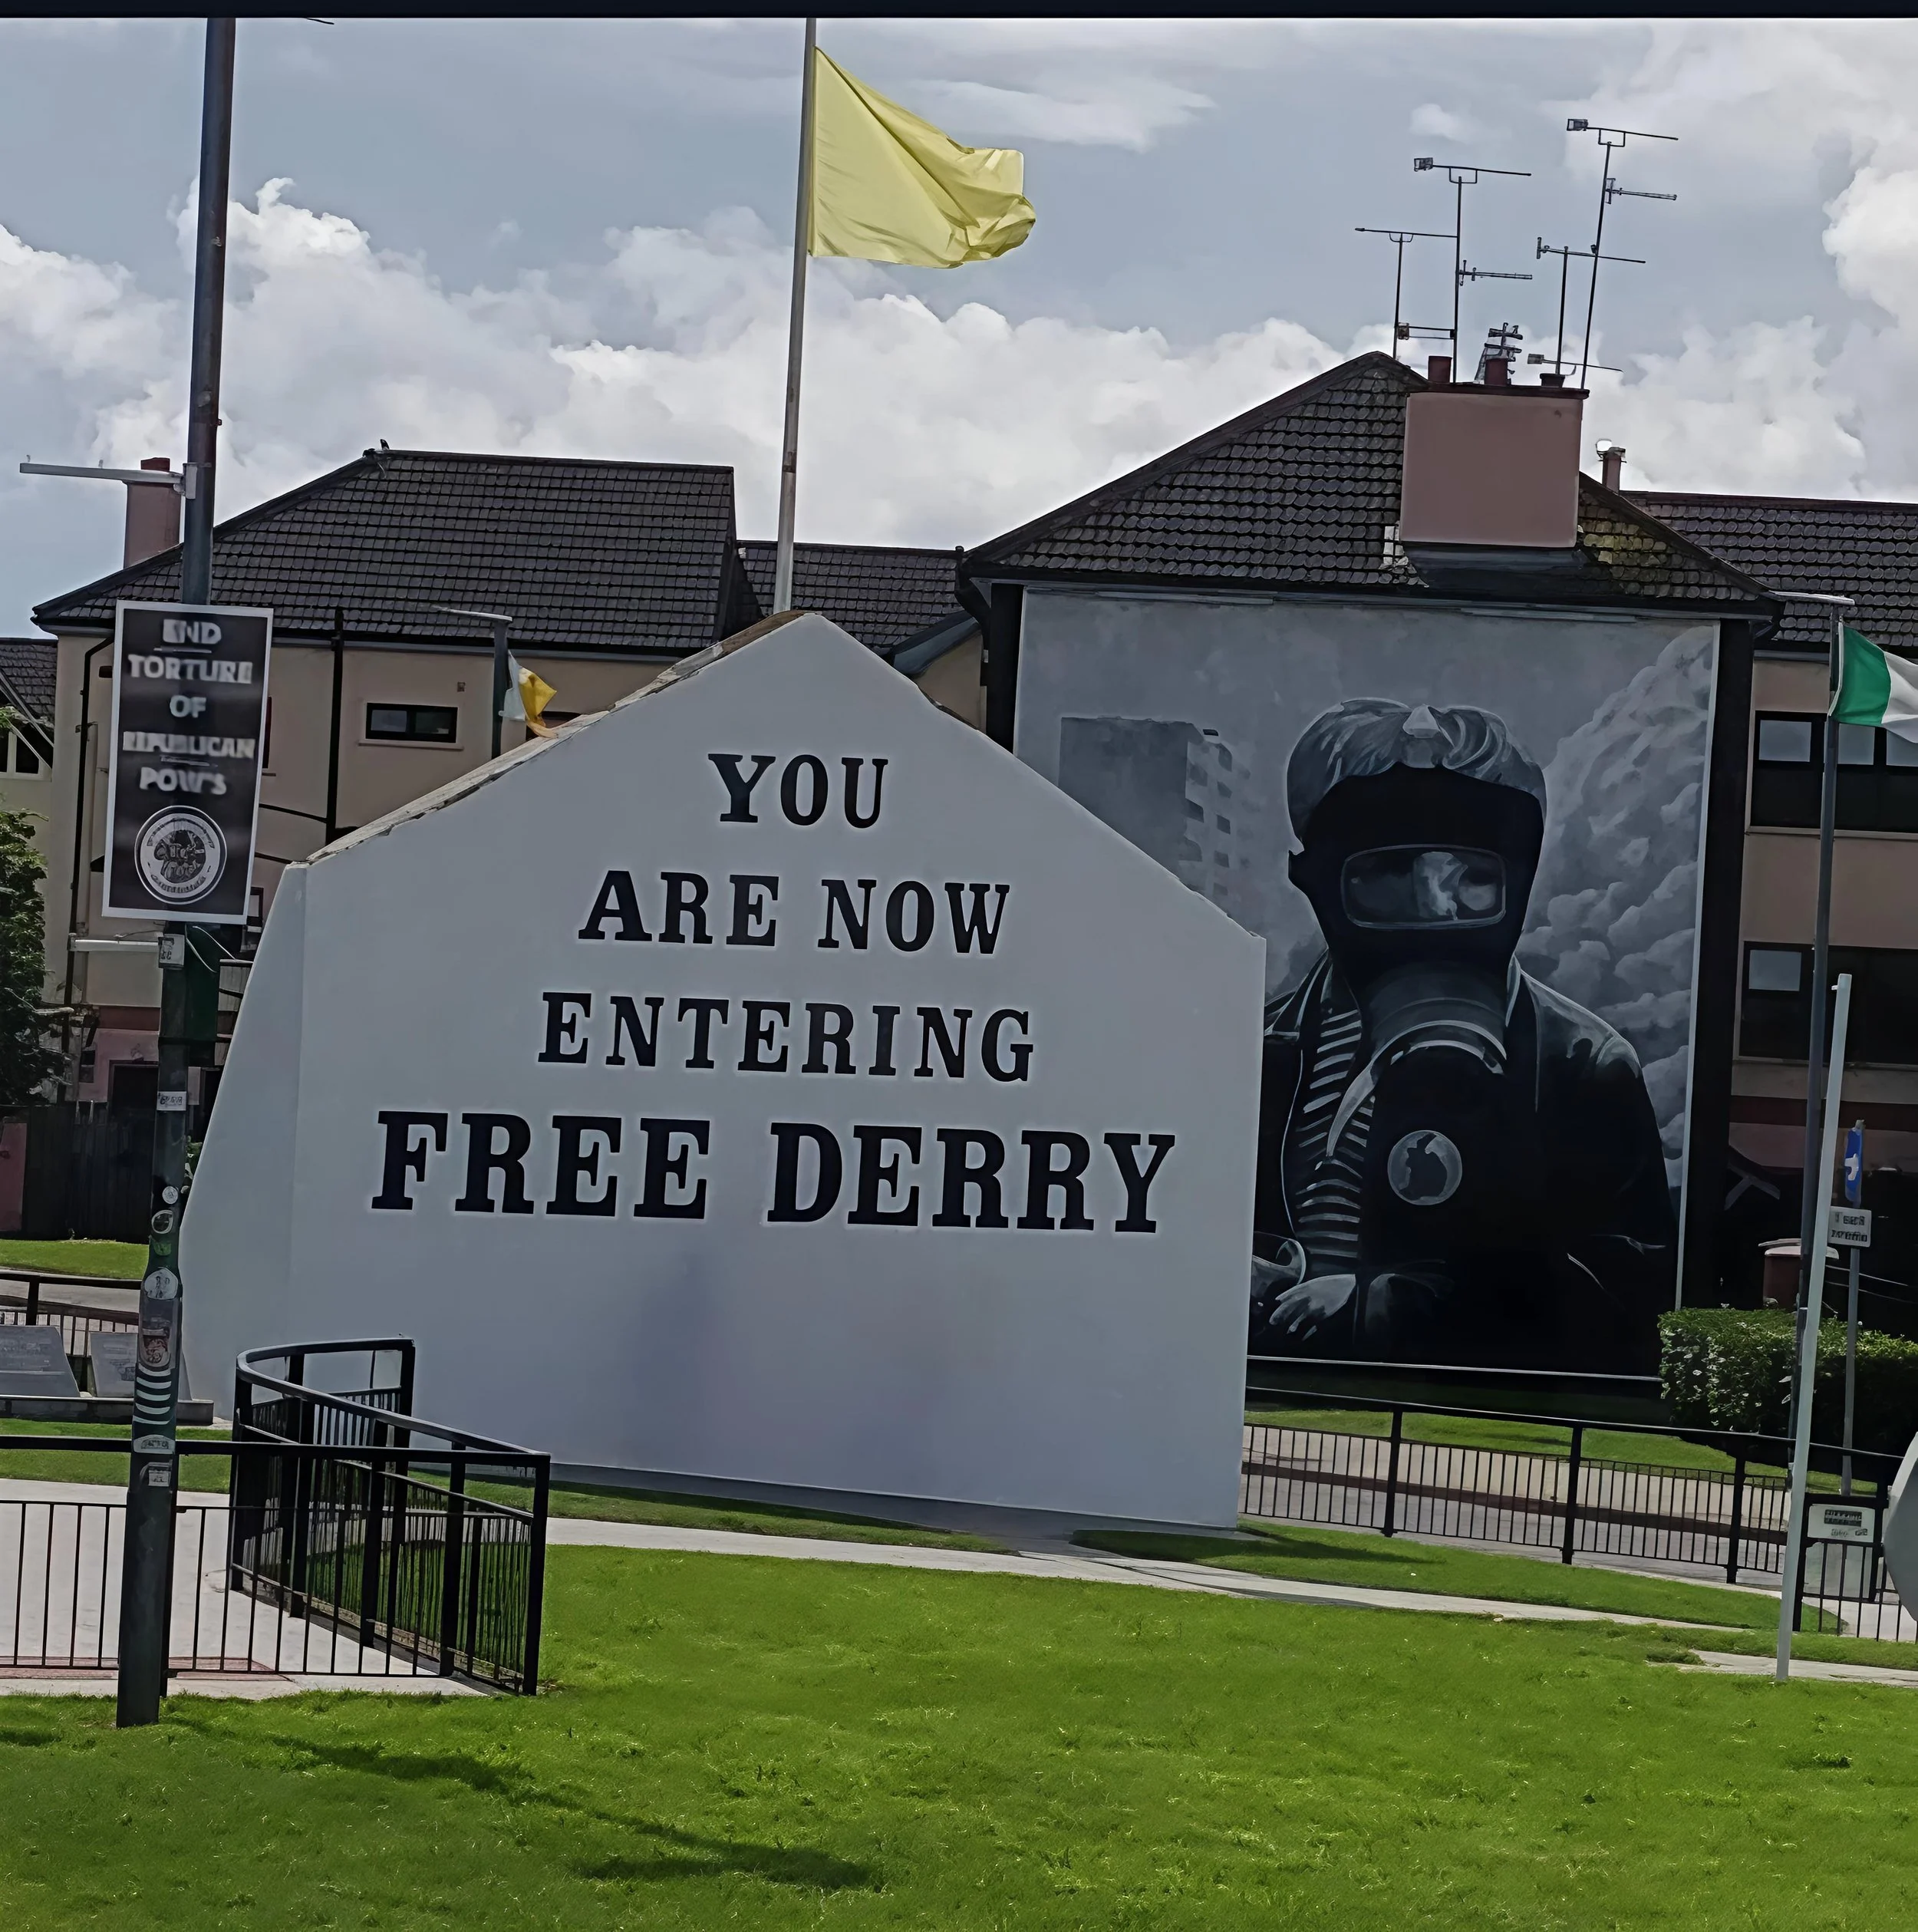
Londonderry / Derry: Walls Above the Bogside.
Derry’s walls rise above the Bogside. overlooking streets where civil rights marches, barricades, and Bloody Sunday transformed the city into one of the defining landscapes of the Troubles. Today, murals and memorials remain embedded within the streets below, preserving a coflict that never fully disappeared from the structure of the city itself.
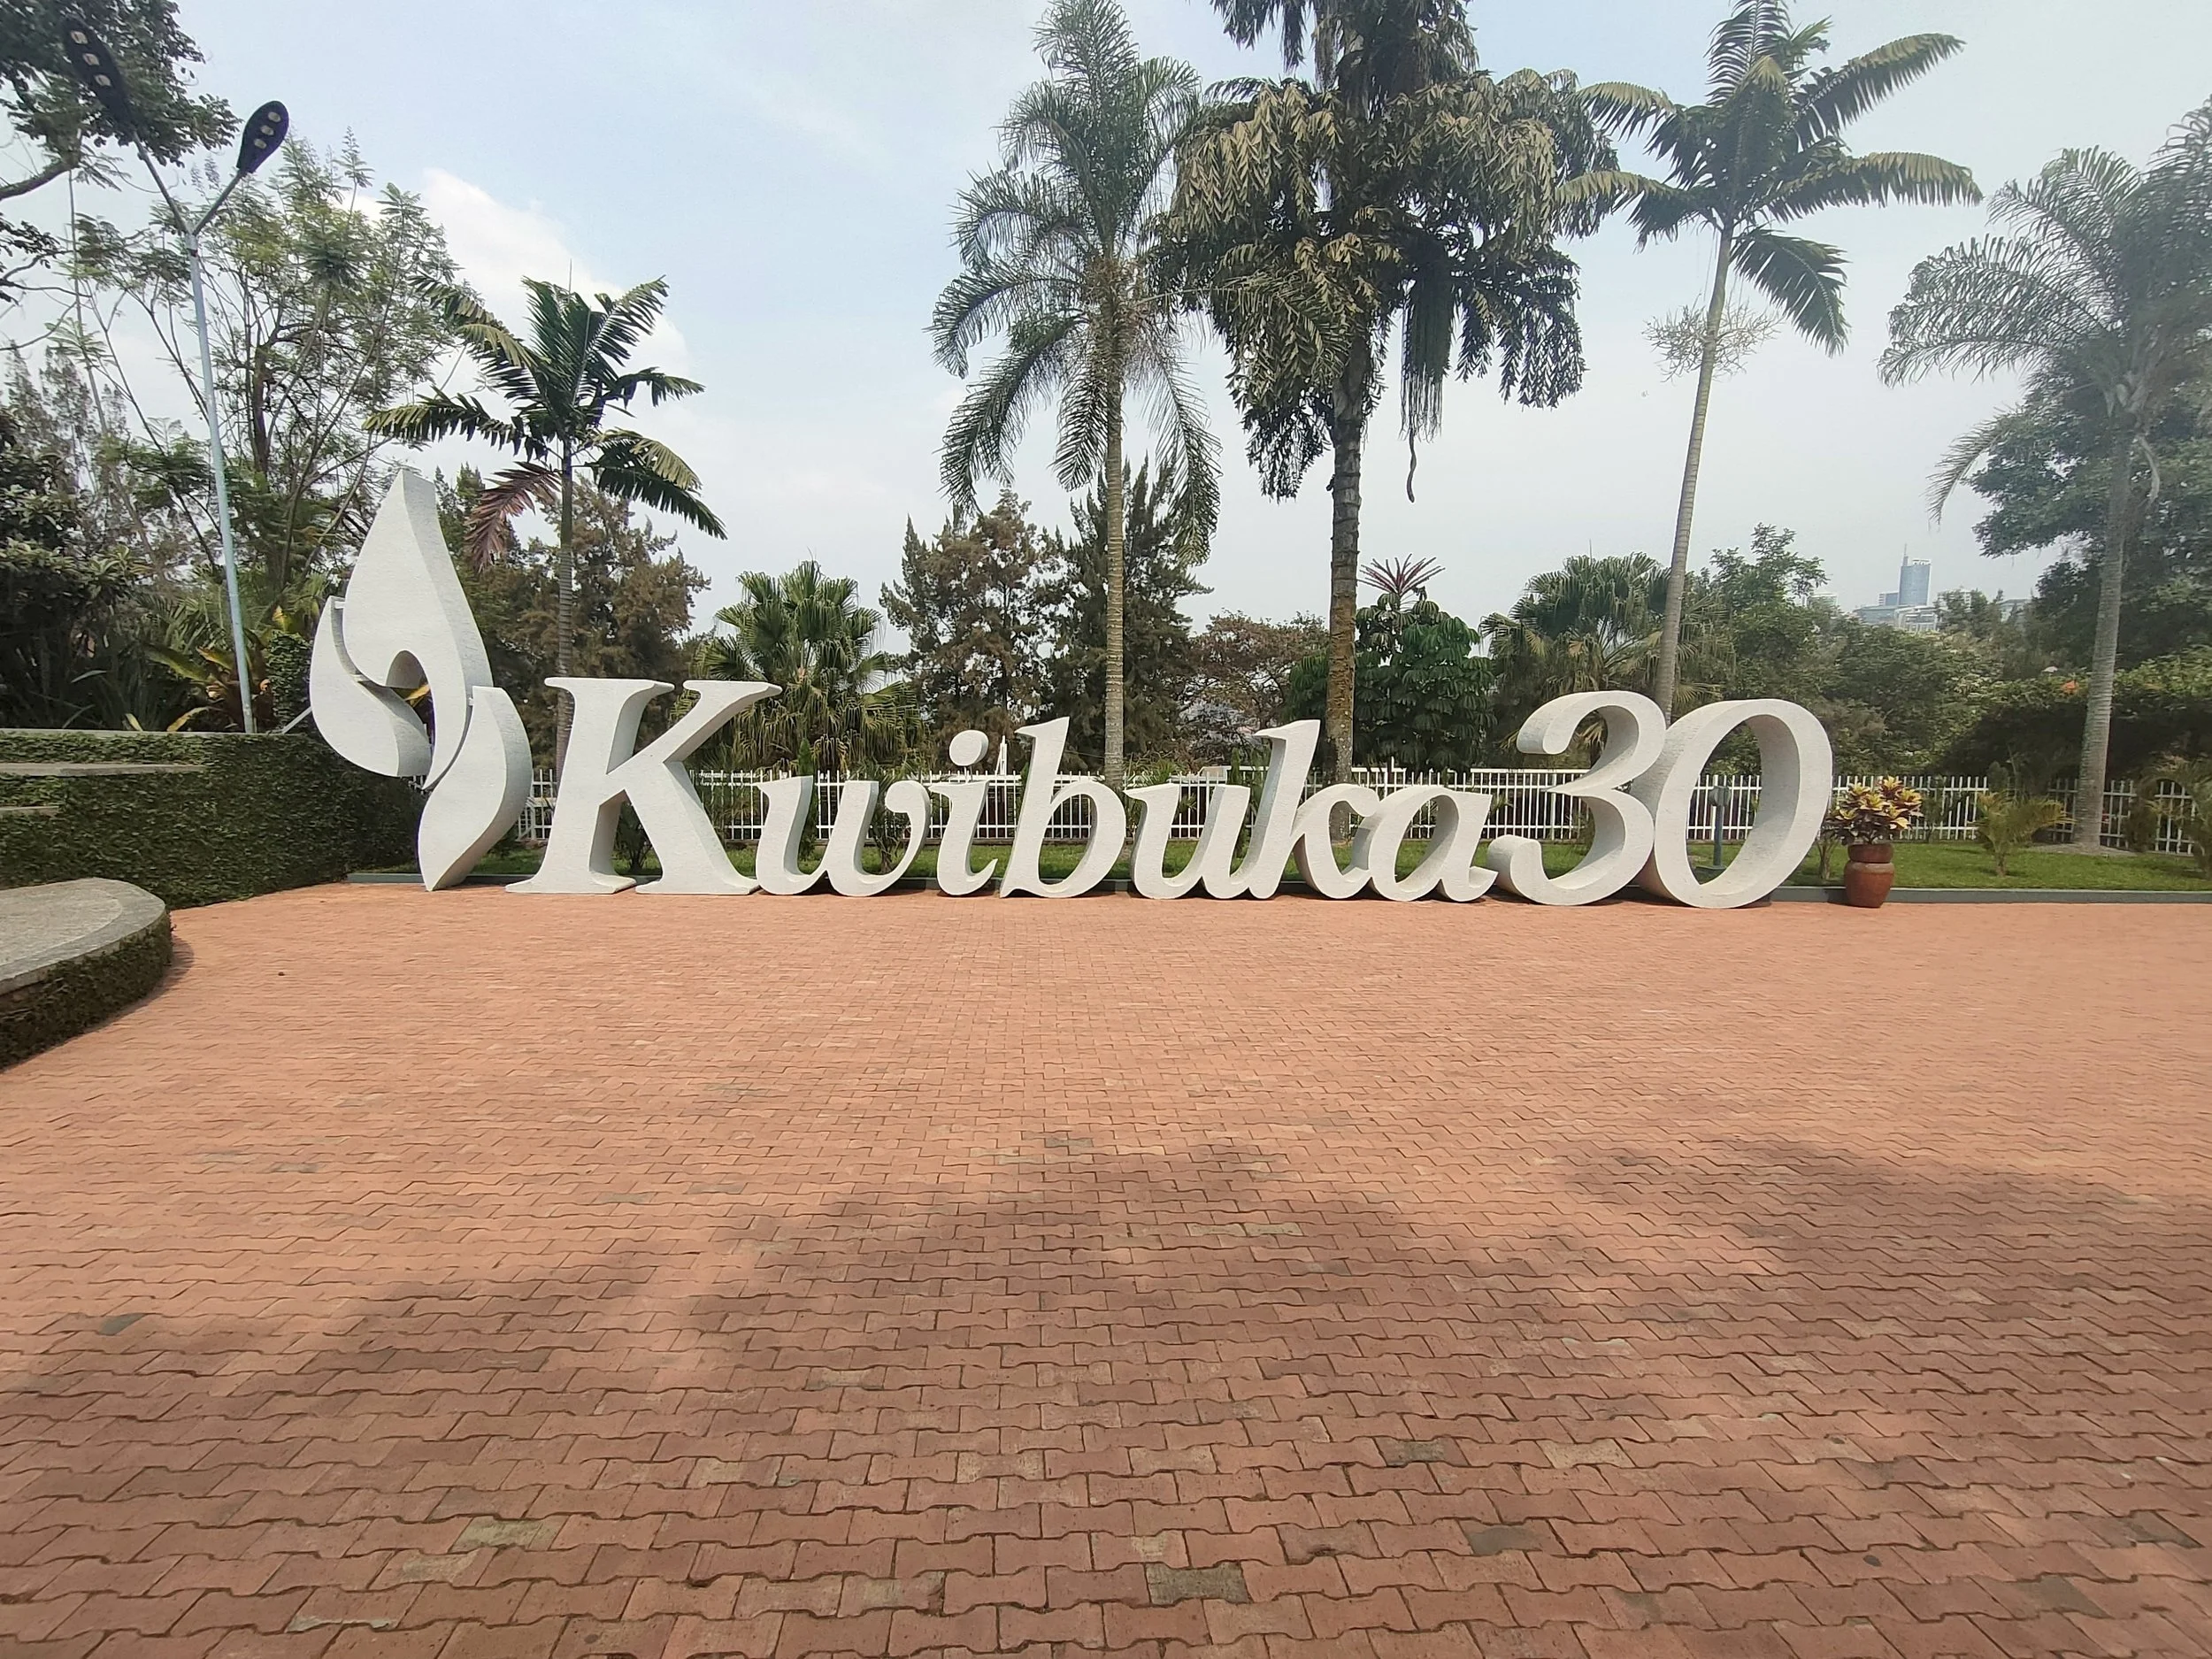
Kigali, Two Museums, One Wound.
In Kigali, two museums shape how Rwanda remembers 1994. One centres on the dead, the other on the force that stopped the killing. Together, they reveal how a nation builds memory after genocide.
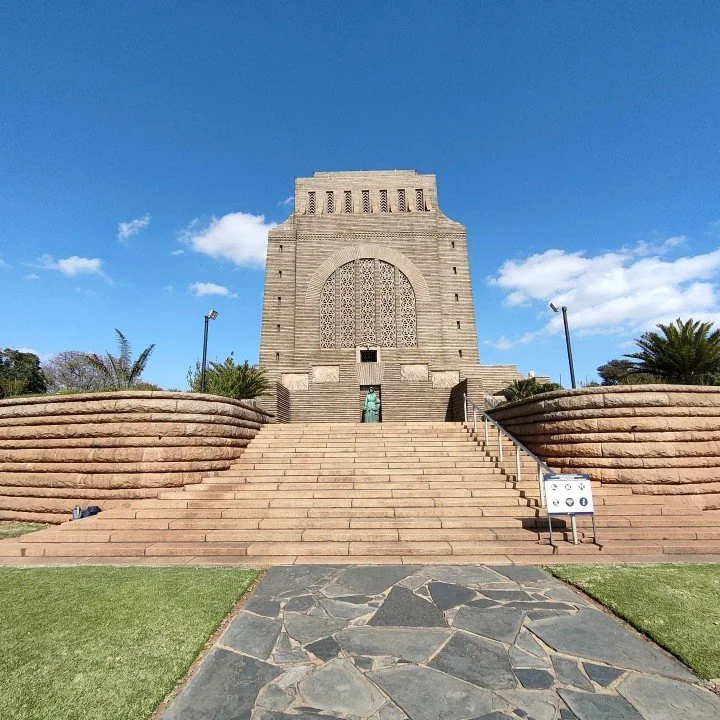
The Voortrekker Monument.
The Voortrekker Monument was built to fix history in stone.
Not to ask what happened, but to decide what it meant.
This is a monument to movement turned into permanence, memory engineered through architecture, light, and belief.

Albania Land Of Bunkers: When Fear Becomes Concrete.
Albania is a country littered with 700 000 concrete bunkers — monuments to a war that never came. From secret police hideouts to underground theatres, these Cold War relics tell a story of fear, control and survival etched into the landscape.

South African Battlefields: Blood River, Isandlwana & Rorke’s Drift, Talana Hill.
From Blood River to Isandlwana, Rorke’s Drift and Talana Hill, South Africa’s battlefields echo with stories of courage, loss, and resilience. These landscapes witnessed clashes that shaped nations and still carry the silence of memory today.

Ruins in the Sand: Failaka and the Ghosts of the Gulf War.
Once a vibrant island community just offshore from Kuwait City, Failaka now stands abandoned—its home bombed, schools empty, and banks scarred by execution. This is not just a place lost to war, but a monument to memory. Explore the ruins of the Gulf War’s forgotten front line.